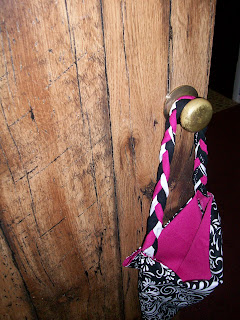
Mmmmm. Love them together!
But I didn't need the trim at the top, so I used my rotary cutter and trimmed it off. I figured I'd use that later. (You'll see!!!)
I cut the printed fabric to the size I wanted for my purse, and used that as the "pattern" for my hot pink fabric. I didn't worry about the uneven edges or anything because I was going to sew it and could straighten it out in the sewing process. I was going for speed because it was late on a Thursday night and I wanted to use it for a job interview on Friday morning.
I put the right sides of the fabrics togethr and sewed the whole way around, leaving just a small unsewn part so I could turn it right side out. (Sorry I don't have pictures... I didn't want to overload the post with photos, and I'm working on the assumption that this step is pretty self-explanatory. Just sew!) I kept the tiny unsewn part unsewn until I was ready to form the bag shape.
For the strap, I wanted to braid 3 strands: Black, White, and Hot Pink.
This is where the trim on the printed fabric comes in.
I took one strip of fabric, folded it in half (right sides together), and sewed up the long side. I kept the ends unsewn. Then I folded one end backwards over the rest of the tube and fed the long part through, turning it right side out. (Repeat for all 3 strips of fabric).
I then flattened the fabric with the seam down in the middle. I ironed the fabric then to try to keep the seams in the back instead of on the sides.
For the braided strap, I layered the strips on top of each other and secured with a pin. Then I put the end under my sewing machine (hey, I needed a place to secure it. Don't judge. Secure however you're able.). Then braid. Make the braid as tight as possible, leaving about an inch at the bottom. When the braid is finished, layer the strips again and pin together. You can adjust the braid if necessary, for spacing purposes, etc.
Now I set the braid aside and formed the bag shape. Just like when I put the lining with the bag, I put the right sides of the print together and sewed up the sides, (the bottom was the folded edge: no sewing needed) and made sure to include the unfinished edge from earlier. (The unfished edge from earlier was folded so the raw edges were inside and not fraying all over the place.)
To add the straps, I just sewed the ends to the seams of the bag, so the strap goes across the whole bag. (This was mostly because I didn't have enough solid black and white fabric to make two braids for two handles.)
TA-DA!!!


No comments:
Post a Comment