Saturday, September 22, 2012

Project 18: Team-Spirit Apron

Ugh. Awful. I have been inactive for FAR too long... but have no fear, I've still been crafting!!! The latest project is an NFL hostess apron, made with NFL fabric and fun trim, for all the ladies who hostess AND cheer for their team in the fall!

This is my favorite time of year... hoodies and jeans, nice breezes, apples, and crisp, colorful leaves!!! But my favorite thing about fall has got to be the return of my favorite sport. I LOVE football, and for many of the games we are inviting friends and family over to our home. We are always making some kind of food, so a cute team-spirit apron seems appropriate!

They are super easy to make. Here's what you'll need.
3/4 yard of NFL team fabric
3/4 yard of accent fabric (you'll have enough left over to make two aprons or 1 apron and some accessories... those are coming later!)
1 package of Extra Wide Double Fold Bias Tape

and of course, your supplies, like a rotary cutter/scissors, cutting mat, sewing machine, and coordinating thread.

CUT:
NFL Fabric: 1 piece, 24" wide x 26" long (This can be adjusted based on your preferences)
TRIM: 2 pieces, 2" x 24" each (This depends on the width of your apron. One piece should be the width of your NFL fabric. The other should be about 2 inches longer), 2 pieces 4"x40" each.

Supplies... TA-DA!
Step 1: Lay one of the 2" x 24" pieces on your NFL fabric, right sides together, at least 2 inches from the bottom.
Since the print on my fabric is so big, mine is more like 3 inches.
Pin in place.


Step 2: Sew along the bottom edge of the trim fabric.

I used a different colored bobbin and thread. Since the thread will be visible on the back side of the apron,
I used blue so it would blend in. Betcha can't even see it in this picture!

Step 3: Flip the trim piece over the seam you just sewed, trim the bottom of the apron until it matches up with the trim fabric and...

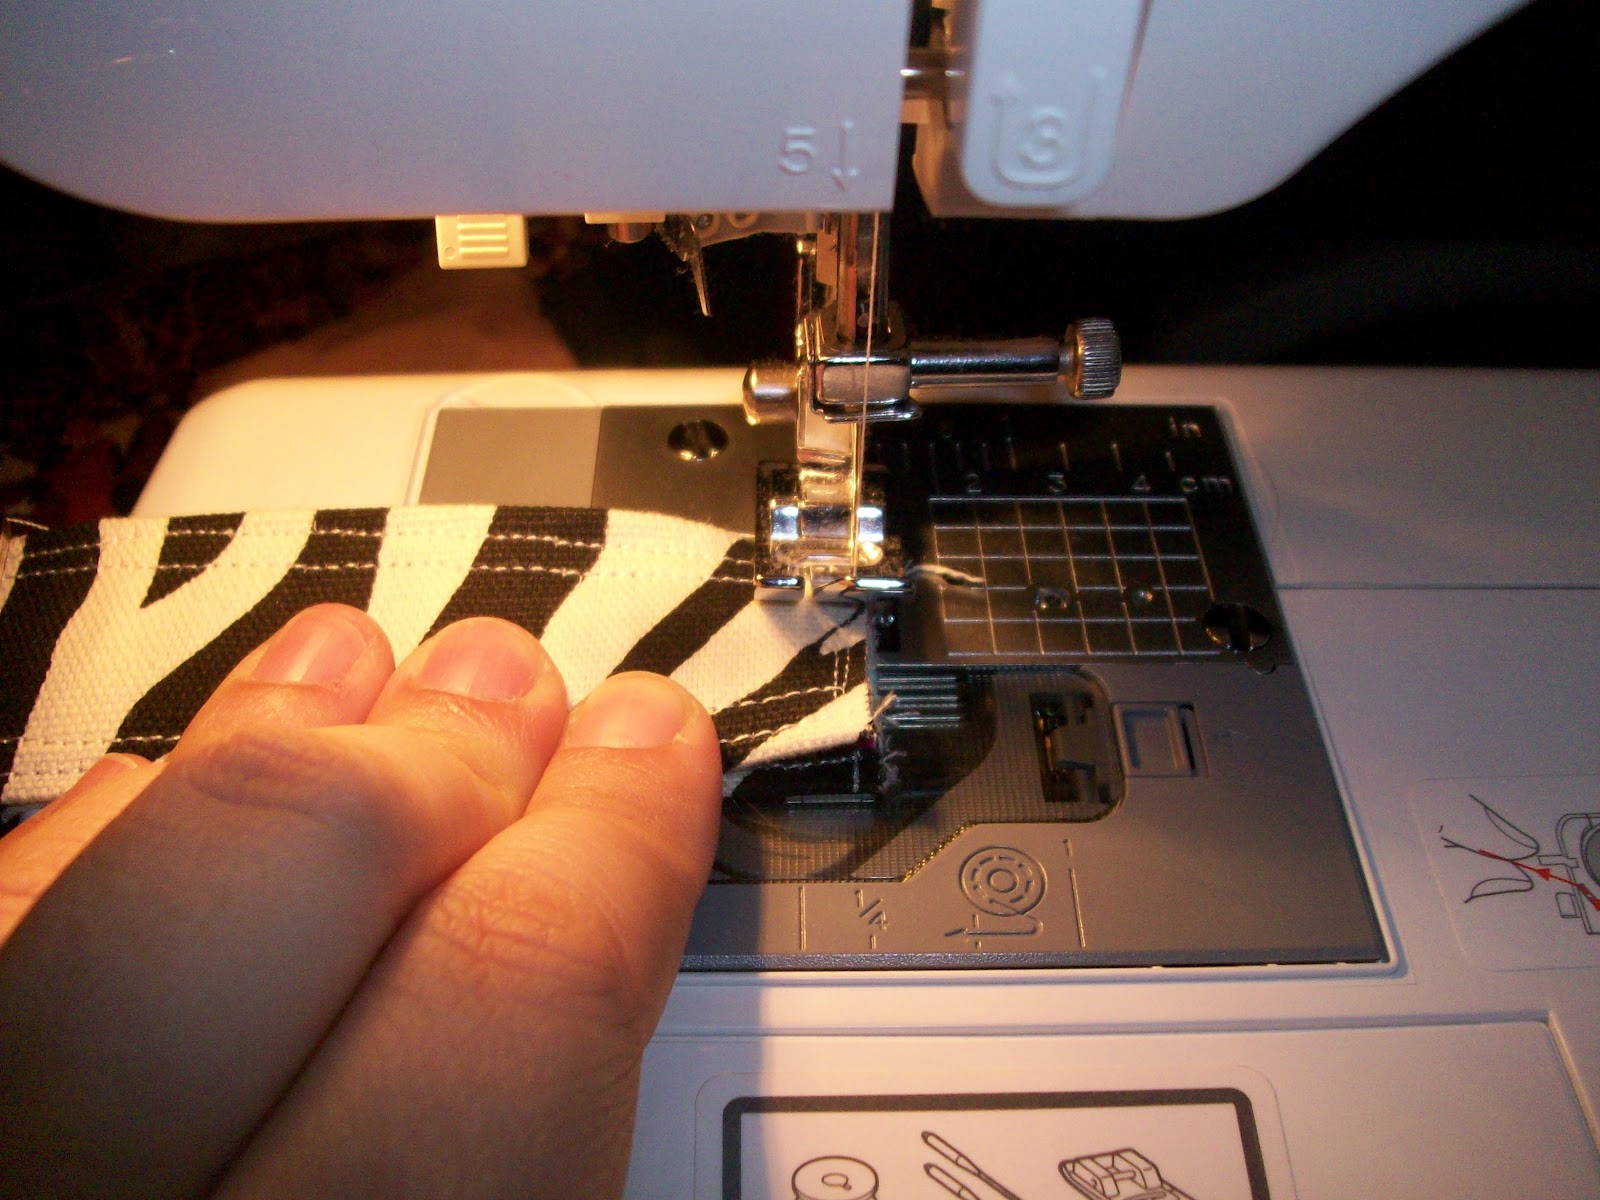
sew along the bottom edge!


Step 4: (NOT PICTURED) Sew your bias tape along the sides and bottom. No need to worry about the top!


Step 5: Lay your waistband piece (2" x 26") on the top of your skirt piece, right sides together. Sew together across the very top with a 1/4" seam allowance.

Step 6: Turn project over to back side of apron. You will flip the waistband piece over, tucking in 1/4", and sew again. (Essentially, the waistband will look like bias tape in the print of your trim.)
There should be one extra inch of trim left over on each side of your NFL fabric.


Step 7: Take 4" x 40" pieces. Each one will be its own tie. Fold each in half and sew along open edge. At one end, sew a diagonal. Turn ties right-side-out and press. Then, fold under the open edge 1/2".

To attach, insert the inch of fabric from the waist band into the tie "tube."
If your machine can handle it, a pleat at the seam here looks adorable. I just folded my tie tube until it was the same width as the waistband and sewed it together. I'll admit it. My machine is cheap. So I did what I could.


Once your ties are attached, you are all done!


TA-DA! Your finished product!

Ready to host game night!

Monday, July 23, 2012

Project 17: Wristlet Key Ring

This is quite possibly the easiest and cheapest DIY project ever. Ever. And a great gift!

This Wristlet Key Ring is a great option for any of your friends who seem to lose their keys frequently. You'll need: 
Base fabric: 5"x14"

Accent fabric: 3.5"x14"

Key ring. This pack of four different sizes was bought for under $1 at Home Depot. I used the 1.5" size.


Step 1 (a): Lay your base fabric good-side-down on your work surface. Find the middle and fold one side in toward the middle.

Step 1 (b): then fold the other side into the middle...

Step 1 (c): Then fold in half, pinning folded edges in place. Sew around the entire piece.

 Not shown: Step 2: Repeat steps 1 (a) - 1 (c) with your accent fabric.

Step 3: Center your accent fabric on your base fabric and pin. Sew the entire way around, including the ends.

Step 4: Trim ends.

Step 5: Put one end through keyring. Fold fabric into a loop with the right sides together.

Step 6: Sew, using a zig-zag stitch. A few layers for reinforcement here is a great idea!


Step 7: Turn loop so right sides are out. Attach your zipper foot (to allow you to sew closer to the key ring) and sew. Again, multiple runs are helpful for reinforcement. 

That's all! I don't know if that warranted a tutorial, but I thought I'd share. I think this is a great option for friends, especially if you are giving them a purse or some accessory for a birthday or Christmas. It's also a great little gift to share with friends for no reason at all.

Happy Crafting!

Friday, July 13, 2012

As promised... more clutch photos!

I've had a blast making these... the most fun part is choosing the lining to go with the fabric! Here are a few more:


Thursday, July 12, 2012

Project 16: The Bow Wristlet

I discovered this adorable wristlets at a craft show and decided to make my own. It's still a learning process, but I think I have the pattern down now! The great thing is that you can make them in many sizes... I've done smaller ones with 7 inch zippers and this one is a little larger, with a 9 inch zipper! They're relatively quick and easy!

Let's begin!

You'll need:
1/4 yard outer fabric (Minnie Mouse)
1/4 yard lining (polka dots)
Ruler
Scissors/Rotary Cutter
9" zipper in coordinating color
coordinating thread
interfacing (if your fabric is thin)

Step 1: Cut two pieces of your outer fabric, each measuring 12" by 7".

Step 2: If you need interfacing to strengthen your fabric, cut one piece for each side, slightly smaller than the outer fabric pieces. My pieces of interfacing measured about 5"x9".
Fuse interfacing to wrong side of outer fabric pieces.

Step 3: In addition to the already-cut outer pieces,
Cut THREE 12"x7" pieces of your lining (there are only 2 here because I forgot the third. Oops!)
Cut ONE 6"x3" piece of your outer fabric
Cut a 15"x4" strip of either fabric (I recommend the one with the smaller pattern)

Step 4: We'll create the strap for your wristlet. Fold the long piece in half, right sides together.
Sew a line down the raw edges. (Zig zags can be helpful, to discourage fraying.) This will give you a tube.


Turn the tube right-side-out.

Fold in half to create a loop. Determine how long the strap needs to be to comfortably fit on your wrist. Sew ends together and trim extra material.

Step 5: Creating the bow loop. Take your 6"x3" piece of outer fabric, and fold in half, hamburger style.

With right sides together, sew sides and fold. Leave the end open for turning right side out.

Not pictured: Turn your loop right-side-out. Fold in raw edges on end. Sew along bottom. Fold loop in half with the side you want on the outside of the loop on the inside. Sew ends together. Turn right-side-out.
Now your loop is ready for the bow.

Step 6: Take on piece of your lining fabric and fold over raw edges to back, sewing a hem on both long sides.
This is for your bow.

Pinch one end of the bow fabric...

...and slide into bow loop!

Step 7: Inserting the zipper. I am terrible at this and really hate it, and I don't want to advise you too much because I feel like my advice will make you screw it up. So please follow whatever tutorial you'd like for sewing zippers, if you need assistance.

For zippers, I always put the right sides of one piece of outer fabric and one piece of lining together, then put the zipper between them, and pin, sewing it all together. This will be done on both sides.

What it looks like after the zipper is in place... Outside.

Inside after zipper has been inserted.

Step 8: Pin your bow in place. I tend to put it closer to the top, just because the bottom is about to become much shorter.

Sew through ALL 5 LAYERS (bow, front and lining, back and lining), right sides out. It seems counter-intuitive, but trust me, it makes the end product look much better.

You'll end up with a pouch, like this!

Snip your corners! This will help them lay flat when you turn it inside-out.

Step 9: Turn inside out. We are going to finish our French Seams here.

You'll want to be sure to add the wrist strap in this step. Put it inside the wristlet, with the end of the loop (that you sewed earlier) in the seam of the end where the zipper will be when the wristlet is closed.

To finish the French seam, simply sew with about a 1/2" seam allowance around the interior of your wristlet. The measurement doesn't need to be exact. Just make sure that the raw edges from the previous step are going to be hidden by your seam.

Turn it right-side-out! You're done!

The first wristlet I made... I am a sucker for damask prints and hot pink.

Wristlet to match the tank-top dress I made.